Search Results for: 13485

Implant Card Requirement – A New Requirement of EU 2017/745

This article breaks down and reviews the new implant card requirement as well as Article 18 of EU 2017/745.

We also have available for sale, SYS-037 Implant Card Procedure written to be Article 18 compliant of Regulation (EU) 2017/745, and includes;

  • SYS-037 A, Implant Card Procedure
  • FRM-044 Checklist for Information to be supplied to the patient with an implant
  • FRM-045 Implant Card Checklist for Article 18 Reg 2017-745
  • Native Slide Deck for Implant Card Webinar
  • Recording of the Implant Card Webinar

Implant Card Procedure Implant Card Requirement   A New Requirement of EU 2017/745

Implant Card Requirement, a new requirement from Regulation (EU) 2017/745.

One of the new changes to the regulation is an introduction of a new requirement for implantable devices. These devices must now come with an “implant card” that contains information about the implanted medical device for the patient. The responsibility of the implementation of the new implant card rules lies with the manufacturer of the implantable device and the health institution as required by the EU member states.

What is an implantable device?

Before discussing the specifics of the implant card, we must first define what an implantable device is to determine if the implant card requirements apply to your device or devices. Article 2 Definitions, number 5 of Regulation (EU) 2017/745 defines and outlines what is considered an implantable device.

(5) ‘implantable device’ means any device, including those that are partially or wholly absorbed, which is intended:

– to be introduced in the human body, or

– to replace an epithelial surface or the surface of the eye,

By clinical intervention and which is intended to remain in place after the procedure.

Any device intended to be partially introduced into the human body by clinical intervention and intended to remain in place after the procedure for at least 30 days shall also be deemed to be an implantable device;

(Taken from http://eur-lex.europa.eu/legal-content/EN/TXT/?uri=CELEX:32017R0745 English version)

Is my device considered implantable?

Working with the above definition of an implantable device, you can now compare those requirements against your own devices to determine if they are considered to be an implantable device or not. This can be done by performing a gap analysis of the definition against your device.

Consider what your device is and ask yourself the following questions:

Is my device intended to be partially or wholly absorbed?

If the answer is no, then your device may not be an implantable one. If it is, then you must keep asking yourself questions until you can sufficiently determine your device’s status as implantable or not.

Is my device intended to be introduced in the human body?

No. Ok, that is fine, but is it intended to replace an epithelial surface or the surface of the eye?

To make an awful analogy of the process, it is almost like playing a game of Guess Who with your device. Instead of asking your device if they have red hair or a mustache, you have to ask your device questions like, “Are you intended to remain in place after the procedure?”.

The gap analysis is fine, but you also have to consider some other factors within the wording of the definition. Be careful navigating the specifics because the devil is in the details. In the definition, which is only eighty-nine words long, by the way, uses the word “intended” three different times.

That is important because the definition applies not only to some of the characteristics and uses of the device but also to the intent behind the device. Just because the device can be wholly introduced into the body does not mean that the device is ‘intended’ to be. A better example would be, by clinical intervention, can your device remain in place after the procedure? Could it, perhaps, but is it intended to be? Also, is it the intent of the device to be done so by clinical intervention?

Where to find the implant card requirement?

Regulation (EU) 2017/745 of the European Parliament and of the Council of 5 April 2017 on medical devices is where the introduction of implant cards can be found. The definition of an implantable device is found in Article 2 Definitions, definition number 5.

Article 18- ‘Implant card and information to be supplied to the patient with an implanted device’ is where the implant card requirements can be found. This article contains three sections and four subsections pertaining to implant cards.

Article 18 Implant card requirement and information to be supplied to the patient with an implanted device

Below is article 18 in its entirety so that we can discuss it further in detail.

“1. The manufacturer of an implantable device shall provide together with the device the following:

(a) information allowing the identification of the device, including the device name, serial number, lot number, the UDI, the device model, as well as the name, address and the website of the manufacturer;


(b) any warnings, precautions or measures to be taken by the patient or a healthcare professional with regard to reciprocal interference with reasonably foreseeable external influences, medical examinations or environmental conditions;


(c) any information about the expected lifetime of the device and any necessary follow-up;


(d) any other information to ensure the safe use of the device by the patient, including the information in point (u) of Section 23.4 of Annex I.

The information referred to in the first subparagraph shall be provided, to make it available to the particular patient who has been implanted with the device, by any means that allow rapid access to that information and shall be stated in the language(s) determined by the concerned Member State. The information shall be written in a way that is readily understood by a layperson and shall be updated where appropriate. Updates of the information shall be made available to the patient via the website mentioned in point (a) of the first subparagraph.

Also, the manufacturer shall provide the information referred to in point (a) of the first subparagraph on an implant card delivered with the device.

  1. The Member States shall require health institutions to make the information referred to in paragraph 1 available, by any means that allow rapid access to that information, to any patients who have been implanted with the device, together with the implant card, which shall bear their identity.
  2. The following implants shall be exempted from the obligations laid down in this Article: sutures, staples, dental fillings, dental braces, tooth crowns, screws, wedges, plates, wires, pins, clips, and connectors. The Commission is empowered to adopt delegated acts in accordance with Article 115 to amend this list by adding other types of implants to it or by removing implants therefrom.”

(taken from http://eur-lex.europa.eu/legal-content/EN/TXT/?uri=CELEX:32017R0745)

Who does the implant card requirement apply to?

Section 1. of Article 18 states explicitly that it is the manufacturer who shall supply the information. Fortunately, it is also outlined what information needs to be included and some guidance on how to provide the information.

Take note, though, that the article states it “shall” be provided, “together with the device.” This means that merely having the information available or accessible such as a downloaded PDF on your website, is not sufficient to comply with section 1. Because that is not being supplied together with the device as outlined.

Section 2. of Article 18 applies to member states’ requirements of health care institutions.

Section 1 of Article 18

Section 1 is by far the most extended section of the article and outlines precisely what information must be provided with the implantable device. Not only is this information that must be provided, it specifically must be provided by the manufacturer. The subsections are broken down by topic and can be summarized as the information, warning, maintenance, and misc. Sections.

Section 1. Sub-Section A

This sub-section outlines the specific identifying information that must be provided. It is even specifically “information allowing the identification of the device.” For devices that are produced and manufactured compliant with other standards such as ISO 13485 or the QSR portion of the United States Code of Federal Regulations, a lot of this information is the same information that is required for traceability.

Besides the generic “information allowing the identification of the device,” the other specific information that ‘shall’ be provided is:

  • The name of the device,
  • The device serial number,
  • The lot number of the device,
  • The UDI,
  • The model of the device,
  • The name of the manufacturer,
  • The manufacturers address,
  • The manufacturers’ website.

They don’t just want your device’s driver’s license; they want the driver’s license, library card, passport, blood type, and favorite color. This is done for a purpose but also carries some implications on the maintenance actions of the manufacturer.

First such strict ID requirements mean that the device is traceable and identifiable. There should be absolutely no doubt about who made the device. In the event of an incident, that device should be traceable back to when and where the individual components were created and assembled into the final device. For traceability of an incident, tracking for corrective or preventive action, or just general inventory tracking this is the type of strict diligence that is expected when the end-user or patient is receiving medical care with an implantable device. There is no demonizing of this requirement. Yes, it is strict, but it is also just part of good housekeeping for a manufacturer in general. Only now it must be provided to the patient receiving care with the device as well.

What is implied is that the information provided along with the device is somewhat of a living document, and the information could vary a bit from patient to patient. Because things like lot numbers or any number of trackable metrics used with the UDI are included, the implant card information cannot be generically the same for each device but that it will have sections that are specific to individual devices. Sure this may initially create some logistical headaches for keeping track that the implant cards don’t get mixed up in situations where the devices are being manufactured, but this creates a level of accountability that is designed for the ultimate safety of the end patient.

Section 1. Sub-section B

Sub-section B contains the warning information of the device. The first part is pretty self-explanatory as meaning literally what is stated “any warnings” and “precautions”. It is the next part that I do not interpret literally. Where it says “measures to be taken by the patient or a healthcare professional with regard to reciprocal interference with reasonably foreseeable external influences, medical examinations or environmental conditions”.

If I were the manufacture of an implantable medical device, I would most definitely include measures to be taken by the patient as well as measures to be taken by a healthcare professional. There are a couple of spots that use the word ‘or’, and if it were me, I would read it ‘as well as’.

I say that for a few reasons. One is that without explicit clarification of a governing body as exactly what a silly little word like that is intended to me, this creates an area that is open for debate. Does that ‘or’ mean that at least one of those needs to be included and the rest can be excluded?

As one who likes to err on the side of caution, if you have the information available, why would you not provide it? By going above and beyond not only demonstrates your goodwill but also avoids hang-ups where an auditor might not agree with how you viewed the requirement, and you end up with a nonconformity, or in the same situation with an incident investigator. Ink is cheap; liabilities are expensive.

Section 1. Sub-section C, and Sub-section D.

These two subsections are relatively short and straight forward.

“(c)         any information about the expected lifetime of the device and any necessary follow-up;

How long can the user expect your device to last once it has been implanted?  I there any maintenance they should be performed? Perhaps once a year, a physician needs to double-check the device placement?

(d)         any other information to ensure the safe use of the device by the patient, including the information in point (u) of Section 23.4 of Annex I.”

The rest of Section 1. Of Article 18.

“The information referred to in the first subparagraph shall be provided, to make it available to the particular patient who has been implanted with the device, by any means that allow rapid access to that information and shall be stated in the language(s) determined by the concerned Member State. The information shall be written in a way that is readily understood by a layperson and shall be updated where appropriate. Updates of the information shall be made available to the patient via the website mentioned in point (a) of the first subparagraph.

Also, the manufacturer shall provide the information referred to in point (a) of the first subparagraph on an implant card delivered with the device.”

(Taken from http://eur-lex.europa.eu/legal-content/EN/TXT/?uri=CELEX:32017R0745 English version)

At the end of this section, it provides a little bit more information about the purpose of the article but also lays out some guidelines for how to make the required information available.

I specifically mentioned earlier that having the information slapped on a website is not enough by itself. The text states, “any means that allow rapid access to that information”. Certainly, available on the internet is a means that allows rapid access, and it is if you have internet. Using a web-based approach like that is assuming that all the possible patients all have the technology and budget to reach the information. This means that every single possible patient needs a means to access the internet, and the money to pay for internet access. Also, being able to simply access the information rapidly isn’t necessarily providing the information “together with the device” as required.

You also need to have a conversation with your notified body and determine what languages are required by the member state in which your device is sold. It does not do the patient much good if they do not understand the language in which the information is being presented. It also needs to be presented in easy to understand terms, not in technical jargon.

Updates, unlike the initial presentation of information, needs to be included on your website. Specifically, the website that was included in the implant card given to the patient.

Section 2. of Article 18

Unlike what we saw in Section 1. Section 2. Outlines requirements for the health institutions and not the manufacturer. More specifically, Section 2. Requires member states to require health institutions to perform actions.

This section makes health institutions provide the same information that manufacturers had to provide to patients who have been implanted with a device, with the same stipulations as to how the information is provided. However, it also includes the health institution to include their identity on the implant card as well.

  1. Member States shall require health institutions to make the information referred to in paragraph 1 available, by any means that allow rapid access to that information, to any patients who have been implanted with the device, together with the implant card, which shall bear their identity.

(Taken from http://eur-lex.europa.eu/legal-content/EN/TXT/?uri=CELEX:32017R0745 English version)

Exemptions allowed in Article 18.

Section 3 of Article 18 is the list of exempted implants, exempted devices are:

  • Sutures
  • Staples
  • Dental Fillings
  • Dental Braces
  • Tooth Crowns
  • Screws
  • Wedges
  • Plates
  • Wires
  • Pins
  • Clips

This is not an exhaustive list and can change with time at the discretion of the Commission. What it has done is taken implanted devices and exempted some of the most common and widely used ones. Thankfully so too, imagine if every staple needed an implant card to be presented to the receiving patient with individual batch and identifying numbers. Then coordinate the effort with a health institution so that the card also bears their identification as well. This would quickly become exhaustive.

  1. The following implants shall be exempted from the obligations laid down in this Article: sutures, staples, dental fillings, dental braces, tooth crowns, screws, wedges, plates, wires, pins, clips, and connectors. The Commission is empowered to adopt delegated acts in accordance with Article 115 to amend this list by adding other types of implants to it or by removing implants therefrom.”

(Taken from http://eur-lex.europa.eu/legal-content/EN/TXT/?uri=CELEX:32017R0745 English version)

Implant Card Requirement – A New Requirement of EU 2017/745 Read More »

Data Analysis Procedure (SYS-017)

The purpose of this 5-page data analysis procedure is to meet the requirements for monitoring and measurement of processes, data analysis and establishing quality objectives.

Your cart is empty

What is the Data Analysis Procedure (SYS-017)?

This procedure meets the requirements for clause 8.4 of ISO 13485:2016, but this procedure also addresses the requirements of clauses 8.2.5 and clause 5.4.1. The title of this procedure is actually, “Monitoring, Measurement and Data Analysis Procedure.” The procedure is in its third draft. There are no specific forms or lists associated with this procedure. The procedure is 5 pages in length.

The purpose of this procedure is to define the process for monitoring, measuring, and analysis of processes within your company’s quality management system. The procedure was updated to include references to the applicable ISO 13485:2016 clauses, and Matthew Walker added color coding (i.e., blue font) and symbols (i.e., #) to facilitate auditors identifying where the requirements for each sub-clause are found. The procedure also explains where the requirements for monitoring and measurement of processes can be found for each process.

Data Analysis Procedure Data Analysis Procedure (SYS 017)
SYS-017 - Monitoring, Measuring and Data Analysis Procedure
SYS-017 Monitoring, Measuring and Data Analysis Procedure - This procedure explains how the monitoring and measuring of each process (ISO 13485: 2016, Clause 8.2.5) shall be documented within procedures; how monitoring and measuring of product conformity (ISO 13485:2016, Clause 8.2.6) shall be conducted; how quality objectives (ISO 13485:2016, Clause 5.4.1) shall be established and maintained; how data analysis (ISO 13485:2016, Clause 8.4.1) of the above metrics shall be performed; and how the above information shall be communicated to top management (ISO 13485:2016, Clause 5.6) to actions may be taken when appropriate.
Price: $299.00

Please note: This product will be delivered to the email address provided in the shopping cart transaction. After the transaction is verified, please check your email for the download. 

When is the live webinar scheduled for this procedure bundle?

The live webinar is scheduled for Saturday, October 5, 2024 @ 9:30 a.m. ET. If you purchased the procedure before September 30, you will receive login information to participate in the live webinar. The webinar will be hosted on Streamyard.com. If you are unable to participate in the live webinar, please send us your questions in advance so that we can be sure to address your questions in the live webinar. You will be able to download the recording from the Dropbox folder after the live webinar and you can watch it as many times as needed.

What do you get when you purchase the Data Analysis Procedure?

Screen Capture of Dropbox Folder 1 Data Analysis Procedure (SYS 017)

Scope of the Data Analysis Procedure

The scope of the procedure explains how monitoring and measurement processes shall be documented for each process in your quality management system. The procedure also defines how quality objectives will be established and maintained. The procedure defines how data analysis shall be performed for the metrics for each process and the quality objectives, and finally the method for communicating the conclusions of the data analysis to top management are defined.

This procedure does not include the requirements for statistical techniques as required by 21 CFR 820.250. That requirement is addressed by our Statistical Techniques Procedure (SYS-022).Data Analysis Procedure Data Analysis Procedure (SYS 017)

 To view all available procedures click here

To review a sample Medical Device Academy procedure click below:

managment review sample SOP Data Analysis Procedure (SYS 017)

About Your Instructor

Winter in VT 2024 150x150 Data Analysis Procedure (SYS 017)

Rob Packard is a regulatory consultant with ~25 years of experience in the medical device, pharmaceutical, and biotechnology industries. He is a graduate of UConn in Chemical Engineering. Rob was a senior manager at several medical device companies—including the President/CEO of a laparoscopic imaging company. His Quality Management System expertise covers all aspects of developing, training, implementing, and maintaining ISO 13485 and ISO 14971 certifications. From 2009 to 2012, he was a lead auditor and instructor for one of the largest Notified Bodies. Rob’s specialty is regulatory submissions for high-risk medical devices, such as implants and drug/device combination products for CE marking applications, Canadian medical device applications, and 510k submissions. The most favorite part of his job is training others. He can be reached via phone at +1.802.281.4381 or by email. You can also follow him on YouTubeLinkedIn, or Instagram.

Data Analysis Procedure (SYS-017) Read More »

PMCF Mobile App Webinar

Andaman7 was the guest presenter of this webinar on PMCF mobile app use for clinical data collection required for medical device CE Marking.

Description of the PMCF Mobile App Webinar

The Andaman7 webinar was hosted live by Rob Packard on Thursday, February 27, 2020 with two different live webinar times to accommodate our clients from Europe and the USA. Both sessions were recorded and links for downloading the recordings are available if you complete the form below. David Levesque was the guest speaker from Andaman7. He explained how Andaman7 works, and how it can be used to gather patient-reported outcomes for the purpose of PMCF studies. If you complete the registration form below, you will receive a link to the recording and a copy of the slide deck. Registration is free if you enter a question into the form. Andaman7 will also receive your question by email. If you want Andaman7 to contact you directly, please check the appropriate box.

Why no company should provide a justification for no PMCF

Regulation (EU) 2017/745, Annex II(6.2d) states that your CE technical documentation shall include, “the PMCF plan and PMCF evaluation report referred to in Part B of Annex XIV or a justification why a PMCF is not applicable.” Despite this statement, you must still provide a PMCF plan as part of your technical documentation. You also are required to gather clinical data on your own device or an equivalent device. Demonstrating “equivalence” is extremely difficult under the new EU regulations. Therefore, if a clinical study was not conducted for your device, and your device is already CE Marked, a PMCF study is the only way for you to collect clinical data. For Class IIb implants and Class III devices, clinical investigations are required, and Notified Bodies are expecting a PMCF study to be conducted for all high-risk products that are currently CE Marked.

How to conduct a PMCF study

The following steps are needed to conduct a PMCF study:

  1. Identify residual risks associated with your device
  2. Create a PMCF protocol to gather data for each residual risk
  3. Identify a principal investigator(s) and clinical site(s) for your PMCF study
  4. Validate methods for collecting PMCF data in accordance with your protocol via: paper case record forms, electronic data capture software, or eSource.
  5. Statistical analysis of PMCF data and generation of a PMCF report

Using PMCF Mobile App for collecting PMCF data

Andaman7 is a software app designed to collect patient-reported outcomes (PRO). The company converts your protocol into a form for data collection by their mobile app. Clinicians and patients can download the app and enter data into the mobile app, but the software enables patients to own the data and take it with them. Andaman7 is ideally suited for gathering PMCF data, because it provides a mechanism for encouraging patient follow-up and collecting PMCF data–even when patients move or transfer to a new physician. The app also provides a vehicle to efficiently communicate advisory notices to users, and you can collect data more efficiently for complaints and adverse events.

Other resources for PMCF

If you are interested in contacting Andaman7 directly, please try their contact us webpage. If you need additional help with CE Marking requirements, please review our 8-part webinar series on the new medical device European regulations and our Post-Market Surveillance Procedure (SYS-019).

About Your Instructor

Winter in VT 2024 150x150 PMCF Mobile App Webinar

Rob Packard is a regulatory consultant with ~25 years of experience in the medical device, pharmaceutical, and biotechnology industries. He is a graduate of UConn in Chemical Engineering. Rob was a senior manager at several medical device companies—including the President/CEO of a laparoscopic imaging company. His Quality Management System expertise covers all aspects of developing, training, implementing, and maintaining ISO 13485 and ISO 14971 certifications. From 2009 to 2012, he was a lead auditor and instructor for one of the largest Notified Bodies. Rob’s specialty is regulatory submissions for high-risk medical devices, such as implants and drug/device combination products for CE marking applications, Canadian medical device applications, and 510(k) submissions. The most favorite part of his job is training others. He can be reached via phone at 802.281.4381 or by email. You can also follow him on YouTube, LinkedInor Twitter.

PMCF Mobile App Webinar Read More »

Integrating usability testing into your design process

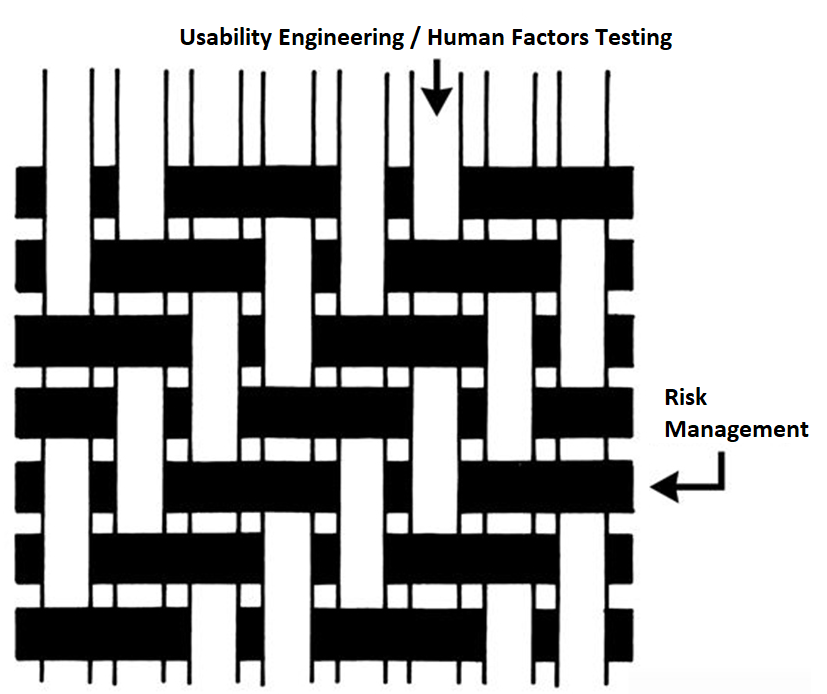
This article explains how you should be integrating usability testing into your design control process–especially formative usability testing.

Integrating Usability Engineering and Risk Management into your Design Control Process Integrating usability testing into your design process

Why you should be integrating usability testing into the design

We recently recorded an updated usability webinar and released a usability procedure (SYS-048) with help from Research Collective–a firm specializing in human factors testing. After listening carefully to the webinar, and reading through the new usability procedure, I felt we needed to update our combined design/risk management plan to specify formative testing during phase 3 and summative (validation) testing during phase 4 of the design process. This is necessary to ensure your usability testing is interwoven with your risk management process. Integrating usability testing into all phases of your design process is critical–especially design planning (phase 1), feasibility (phase 2), and development (phase 3).

Integrating usability testing into your design plan helps identify issues earlier

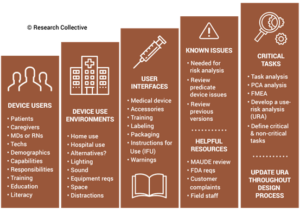
During the usability training webinar, Research Collective provided a diagram showing the various steps in the usability engineering process. The first five steps should be included in Phases 1 and 2 of your design process. Phase 1 of the design process is planning. In that phase, you should identify all of the usability engineering tasks that need to be performed during the design process and estimate when each activity will be performed. The first of these usability activities is the identification of usability factors related to your device. Identifying usability factors is performed during Phase 2 of your design process before hazard identification.

Indentifying Usability Issues 300x209 Integrating usability testing into your design process

Before performing hazard identification, which should include identifying potential use errors, you need to identify five key usability elements associated with your device:

  1. prospective device users during all stages of use must be defined
  2. use environments must be identified
  3. user interfaces must be identified
  4. known use errors with similar devices and previous generations of your device must be researched
  5. critical tasks must be described in detail and analyzed for potential use errors

Defining users must include the following characteristics: physical condition, education, literacy, dexterity, experience, etc. Use environment considerations may consist of low lighting, extreme temperatures or humidity, or excessive uncontrolled motion (e.g., ambulatory devices). User interfaces may include keyboards, knobs, buttons, switches, remote controllers, or even a touch screen display.

Often the best reason for developing a new device is to address an everyday use error that is inherent to the design of your current device model or a competitor’s product. Therefore, a thorough review of adverse event databases and literature searches for potential use errors is an important task to perform before hazard identification. This review of adverse event data and literature searches of clinical literature are key elements of performing post-market surveillance, and now ISO 13485:2016 requires that post-market surveillance shall be an input to your design process.

Finally, the step-by-step process of using your device should be analyzed carefully to identify each critical user task. User tasks are defined as “critical” for “a user task which, if performed incorrectly or not performed at all, would or could cause serious harm to the patient or user, where harm is defined to include compromised medical care.” Not every task is critical, all critical tasks must be identified, and ultimately you need to verify that each critical task is performed correctly during your summative (validation) usability testing.

Evaluating Risk Control Options – Formative Usability Testing in Phase 3 (Development)

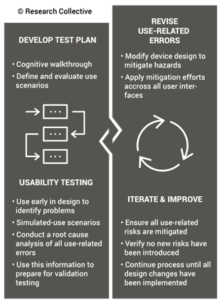
Once your design team has conducted hazard identification and identified your design inputs (i.e., design phase 2), you will begin to evaluate risks and compare various risk control options. Risk control option analysis requires testing multiple prototype versions to assess which design has the optimum benefit/risk ratio. This is an iterative process that involves screening tests. For any use risks you identify, formative usability testing should be performed. Sometimes the risk controls you implement will create new use errors or new risks of other types. In this case, you must compare the risks before implementing a risk control with risks created by the risk control.

Formative Usability Testing Process 220x300 Integrating usability testing into your design process

Ideally, each design iteration will reduce the risks further until all risks have been eliminated. The international risk management standard (ISO 14971) states that risks shall be reduced as low as reasonably practicable (ALARP). However, the European medical devices regulations require risks to be reduced as far as possible, considering the state-of-the-art. For example, all small-bore connectors in the USA are now required to have unique connectors that are incompatible with IV tubing Luer lock connections to prevent potential use errors. That requirement is considered “state-of-the-art.” If your device is marketed in both the USA and Europe, you will need to reduce errors as far as possible–before writing warnings and precautions in your instructions for use.

Reaching the point where use errors cannot be reduced any further may require many design iterations, and each iteration should be subsequently evaluated with formative usability testing. Formative testing can be performed with prototypes, rather than production equivalents, but the formative testing conditions should also address factors such as the use environment and users with different levels of education and/or experience. Ultimately, if the formative testing is done well, summative (validation) testing will be a formality.

Risk Control Effectiveness During Phase 4 – Summative Usability Testing during Verification

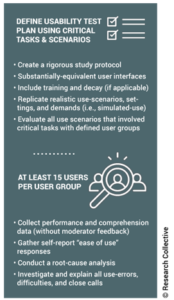
Once your team freezes the design, you will need to conduct verification testing. This includes integrating usability testing into the verification testing process. Summative (validation) testing must be performed once your design is “frozen.” If you are developing an electrical medical device, then you will need to provide evidence of usability testing as part of your documentation for submission to an electrical safety testing lab for IEC 60601-1 testing. There is a collateral standard for usability (i.e., IEC 60601-1-6). For software as a medical device (SaMD), you will also be expected to conduct usability testing to demonstrate that the user interface does not create any user errors.

Summative Usability Testing Process 174x300 Integrating usability testing into your design process

When you conduct summative (validation) testing, it is critical to make sure that you are using samples that are production equivalents rather than prototypes. Also, it is crucial to have your instructions for use (IFU) finalized. Any residual risks for use errors should be identified in the precautions section of your IFU, and the use of video is encouraged as a training aid to ensure use errors are identified, and the user understands any potential harm. When the summative testing is performed, there should be no deviations and no use errors. Inadequate identification of usability factors during Phase 2, or inadequate formative testing during Phase 3, is usually the root cause of failed summative testing. If your team prepared sufficiently in Phase 2 and 3, the Phase 4 results would be unsurprisingly successful.  

Additional Training Resources for Usability Engineering

The following additional training resources for usability engineering may be helpful to you:

Integrating usability testing into your design process Read More »

Returned Material Authorization (RMA) Procedure (SYS-045)

This procedure defines the process for Returned Material Authorization (RMA) in accordance with ISO 13485:2016 and FDA requirements.

Your cart is empty

This returned material authorization (RMA) procedure defines the process for authorization of returned materials. The procedure has been updated to the requirements for ISO 13485:2016. This is the primary document meeting the applicable regulatory requirements for handling of returned product, as defined in your company’s Quality System Manual (POL-001).

The purchase of this procedure includes the following documents:

  • SYS-045 A D1 Returned Materials Authorization (RMA) Procedure
  • LST-014 A D1 RMA Log

Please note: This product will be delivered to the email address provided in the shopping cart transaction. After the transaction is verified, please check your email for the download. 

RMA Procedure Returned Material Authorization (RMA) Procedure (SYS 045)
SYS-045 - Returned Materials Authorization Procedure
SYS-045 Returned Materials Authorization Procedure - The purpose of this procedure is to define requirements for managing returned materials.
Price: $299.00

 To view all available procedures click here

RMA Procedure 1 300x229 Returned Material Authorization (RMA) Procedure (SYS 045)

To review a sample Medical Device Academy procedure click below:

managment review sample SOP Returned Material Authorization (RMA) Procedure (SYS 045)

Returned Material Authorization (RMA) Procedure (SYS-045) Read More »

What is a Gap Analysis?

This article describes what a gap analysis is in the context of managing your quality system when standards and regulations are updated.

Compliance Assessment Gap Analysis Picture 1024x683 What is a Gap Analysis?
Compliance Assessment/Gap Analysis

What is a Gap Analysis? An introductory look.

Well, that depends on the context. The dictionary definition is “A technique that businesses use to determine what steps need to be taken in order to move from its current state to its desired, future state. Also called need-gap analysis, needs analysis, and needs assessment.” 

For the most part, this is correct, but we need to tweak it just a little bit to fit better into our regulatory affairs niche, specifically medical device manufacturers. A gap analysis for financial investment or an advertising firm will be very different than one for a medical device distributor. It might even be better served to be called a compliance assessment/gap analysis, but I am sure someone else has thought of that long before me.

For our purposes, the gap analysis is a formal comparative review of an internal process or procedure against a standard, good practice, law, regulation, etc. This blog article will be an introductory look into that process. We also created a procedure case study that shows how a gap analysis can be used to review your management procedure against the requirements in ISO 13485:2016.

What are the two BIG goals of a Gap Analysis?

It sounds like a simple exercise, but the gap analysis or “GA” for short can have two very different but complementary functions. Rather than simply hunting for areas of non-compliance, the first goal is to find and demonstrate areas of compliance. 

The second more obvious goal is to find the gaps between the process and the regulatory requirements they are being compared against. 

Why is demonstrating compliance important?

Because this is a formal documented review, a gap analysis provides documentation in a traceable manner of meeting the requirements that have been laid out. That traceability is important because it allows anyone to read the report, see the requirement, and locate the area of the procedure that demonstrates conformity with that requirement. 

The report itself is an objective tool, not something that is meant to be a witch hunt. The gap analysis will compare document contents. If you want to verify that the entire process is fully compliant, you will need to dig deeper and observe if the activities laid out within the procedure are being performed per the procedure instructions. It is possible to draft procedures that are compliant with text requirements but non-compliant in the manner that the actions are being performed and documented.

What about gaps?

The gaps, or areas of non-compliance highlight opportunities for improvement, if there are any. A gap assessment may not find any gaps and present a report that clearly and neatly outlines and explains how each regulatory requirement is being met. 

If there are any gaps identified, that does not mean that there is cause for concern. This should be viewed instead as an opportunity for improvement. Standards and procedures change over time, and, naturally, procedures and processes will have to change with them.

The very act of the gap analysis shows that there is a documented effort towards continual improvement as long as the gaps are addressed. 

Addressing the Gaps

The report is ideally the first and last step, and you have a wonderful piece of paper to show that someone checked, and all of the required areas are being met. However, this is not always the case. When there are gaps, they must be filled.

Addressing a gap should happen in a traceable manner, one that shows it was identified, acknowledged, and then how it was fixed. Something that might be addressed through your CAPA process, but that is a topic for a different time. 

In Closing

The compliance assessment/gap analysis is a singular tool used in the overall maintenance of a quality system. Its actions and performance are similar to a simplified type of audit, but the gap analysis itself is not going to replace your regularly scheduled audit activities. However, it will help you monitor and keep your fingers on the overall pulse of your quality system. This is also especially helpful in situations where standards and regulations are updated, and your quality system needs to be evaluated and updated accordingly.

For more in-depth education in specialized areas of the assessment, look into our training on Technical File Auditing for MDR compliance against Regulation (EU) 2017/745 at the link below.

https://medicaldeviceacademy.com/technical-file-auditing/

What is a Gap Analysis? Read More »

Auditing Technical Files

This article explains what to look at and what to look for when you are auditing technical files to the new Regulation (EU) 2017/745 for medical devices.

Your cart is empty

Auditing Technical Files what to look at and what to look for 1024x681 Auditing Technical Files

On August 8th, 2019, we recorded a live webinar teaching you what to look at and what to look for when you are auditing technical files (a link for purchasing the webinar is at the end of this article). Technical files are the technical documentation required for CE Marking of medical devices. Most quality system auditors are trained on how to audit to ISO 13485:2016 (or an earlier version of that standard), but very few quality system auditors have the training necessary to audit technical files.

Why you’re not qualified to auditing technical files

If you are a lead auditor, you are probably a quality manager or a quality engineer. You have experience performing verification testing and validation testing, but you have not prepared a complete technical file yourself. You certainly can’t describe yourself as a regulatory expert. You are a quality system expert. A couple of webinars on the new European regulations are not enough to feel confident about exactly what the content and format of a technical file for CE marking should be.

Creating an auditing checklist

Most auditors attempt to prepare for auditing the new EU medical device regulations by creating a checklist. The auditor copies each section of the regulation into the left column of a table. Then the auditor plans to fill in the right-hand columns of the table (i.e., the audit checklist), with the records they looked at and what they looked for in the records. Unfortunately, if you have never created an Essential Requirements Checklist (ERC) before, you can only write in your audit notes that the checklist was completed and what the revision date is. How would you know if the ERC was correctly completed?

In addition to the ERC, now called the Essential Performance and Safety Requirements (i.e., Annex I of new EU regulations), you also need to audit all the Technical Documentation requirements (i.e., Annex II), all the Technical Documentation on Post-Market Surveillance (i.e., Annex III), and the Declaration of Conformity (i.e., Annex IV). These four annexes are 19 pages long. If you try to copy and paste each section into an audit checklist, you will have a 25-page checklist with more than 400 things to check. The result will be a bunch of checkboxes marked “Yes,” and your audit will add no value.

Audits are just samples

Every auditor is trained that audits are just samples. You can’t review 100% of the records during an audit. You can only sample the records as a “spot check.” The average technical file is more than 1,000 pages long, and most medical device manufacturers have multiple technical files. A small company might have four technical files. A medium-sized company might have 20 technical files, and a large device company might have over 100 files. (…and you thought the 177-page regulation was long.)

Instead of checking many boxes, “Yes,” you should look for specific things in your audit records. You also need a plan for what records to audit. Your plan should focus on the essential records and any problem areas identified during previous audits. You should always start with a list of the previous problem areas because there should be corrective actions that were implemented, and the effectiveness of corrective actions needs to be verified.

Which records are most valuable when auditing technical files?

I recommend selecting 5-7 records to sample. My choices would be: 1) the ERC checklist, 2) the Declaration of Conformity, 3) labeling, 4) the risk management file, 5) the clinical evaluation report, and 6) post-market surveillance reports, and 7) design verification and validation testing for the most recent design changes. You could argue that my choices are arbitrary, but an auditor can always ask the person they are planning to audit if these records would be the records that the company is most concerned about. If the person has other suggestions, you can change which records your sample. However, you don’t want to sample the same records every year. Try mixing it up each year by dropping the records that looked great the previous year, and adding a few new records to your list this year.

What to look for when auditing technical files

The first thing to look for when you audit records: has the record been updated as required? Some records have a required frequency for updating, while other records only need to be updated when there is a change. If the record is more than three years old, it is probably outdated. For clinical evaluation reports and post-market surveillance reports, the new EU regulations require updating these reports annually for implantable devices. For lower-risk devices, these reports should be updated every other year or once every three years at a minimum.

Design verification and design validation report typically only require revisions when a design change is made, but a device seldom goes three years without a single change–especially devices containing software. However, any EO sterilized product requires re-validation of the EO sterilization process at least once every two years. You also need to consider any process changes, supplier changes, labeling changes, and changes to any applicable harmonized standards.

Finally, if there have been any complaints or adverse events, then the risk management file probably required updates to reflect new information related to the risk analysis.

Which record should you audit first?

The ERC, or Essential Performance and Safety Requirements checklist, is the record you should audit first. First, you should verify that the checklist is organized for the most current regulations. If the general requirements end with section 6a, then the checklist has not been updated from the MDD to the new regulations–which contains nine sections in the general requirements. Second, you should make sure that the harmonized standards listed are the most current versions of standards. Third, you should ensure that the most current verification and validation reports are listed–rather than an obsolete reports.

More auditor training on technical files…

We recorded a live webinar intended to teach internal auditors and consultants how to perform a thorough audit of CE Marking Technical Files against the requirements of the new European regulations–Regulation (EU) 2017/745.

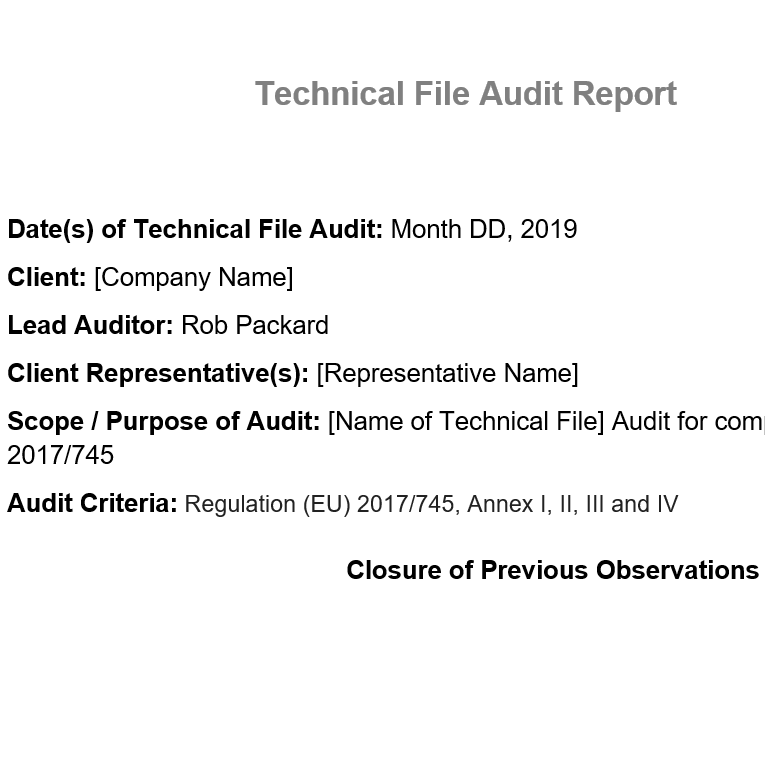
With access to this training webinar, we are also providing a native presentation slide deck, and an audit report template, including checklist items for each of the requirements in Annex I, II, III, and IV of the MDR.

Slide1 300x225 Auditing Technical Files

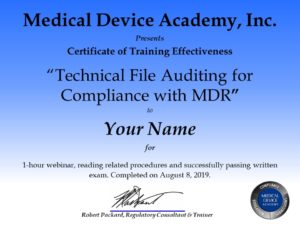
We also provide an exam (i.e., a 10-question quiz) to verify training effectiveness for internal auditors performing technical file auditing. If you submit the completed exam to us by email in the native MS Word format, we will correct the exam and email you a training certificate with your corrected exam. If you have more than one person that requires a training certificate, we charge $49/exam graded–invoiced upon completion of grading.

Technical File Audit Report Auditing Technical Files
Technical File Auditing for Compliance with MDR
This webinar provides an audit report template and teaches auditors how to conduct technical file auditing for compliance with Regulation (EU) 2017/745.
Price: $129.00

In addition to this webinar on auditing technical files, other training webinars are available. For example, we have a webinar on risk management training. If your firm is preparing for compliance with the new MDR, you might also be interested in the following information provided on this website:

Please note: A link for logging into this Zoom webinar will be delivered to the email address provided in the shopping cart transaction. After verifying the transaction, please check your email for the login information. To view the available webinars, click here. If you cannot participate in the live Zoom webinar, a link for downloading the recording will be emailed to you.

Auditing Technical Files Read More »

Incident Reporting Procedure (SYS-035)

The video provided below shows you exactly what you will receive when you purchase our Incident Reporting procedure (SYS-035).

Your cart is empty

(The video above describes the previous revision of this procedure and does not reflect Health Canada’s updates from Mandatory Problem Reporting to the new Incident Reporting requirements. A new video specifically for the updated Incident Reporting procedure is on its way soon.)

The purpose of the procedure is to define requirements for reporting adverse events to Health Canada. This procedure is the primary document meeting the applicable regulatory requirements for adverse event reporting under Sections 59-61 of the Canadian MDR as defined in the Quality System Manual (POL-001).

These documents are updated for

  • ISO 13485:2016
  • SOR 98-282, Last Amended December 23, 2021
  • SOR/2020-262

. The following is a list of documents included:

  • SYS-035 A, Incident Reporting Procedure
  • FRM-053 A, Health Canada Incident Report
  • SOR 98-282, Last Amended December 23, 2021
  • Incident Reporting For Medical Devices Guidance
  • Foreign Risk Notification For Medical Devices Guidance
  • List of Regulatory Agencies for the Purposes of Section 61.2 of the Medical Devices Regulations

Mandatory Problem Reporting Procedure Incident Reporting Procedure (SYS 035)
SYS-035 - Incident Reporting Procedure
SYS-035, Mandatory Problem Reporting Procedure; Included with this procedure is the most recent copy of SOR 98/282, a Mandatory Problem Reporting guidance and links to download our slide deck and webinar recording on Complaint Handling and Vigilance.
Price: $299.00

Unique Features of this Incident Reporting Procedure

Well-written procedures typically state that you should review and update your risk management documentation when you are investigating complaints–especially when there is a new adverse event to report. However, this procedure includes references to the risk management process and makes recommendations on specifically what to review and update. Specifically, it recommends that the scale used to quantitatively estimate severity of potential harm be aligned to identify which scores require Incident reporting, and which scores do not require reporting.

The section of the procedure that is specific to monitoring and measurement also identifies specific metrics related to the Incident reporting process to track and report to Top Management during Management Review meetings. These metrics include tracking the closure of complaints, preliminary reporting timelines and final reporting timelines. The procedure even includes links to the post-market surveillance procedure to remind you to update your post-market surveillance plan to ask questions related to new or revised risks related to the adverse event you are reporting.

Please note: This product will be delivered to the email address provided in the shopping cart transaction. After the transaction is verified, please check your email for the download. To view all available procedures click here.

Incident Reporting Procedure (SYS-035) Read More »

Accelerating design projects – one secret you haven’t heard

This article identifies one overlooked secret to accelerating design projects that you can implement immediately, and it will work on every project.

A secret Accelerating design projects   one secret you havent heard

You would love to cut a few weeks off the launch schedule for your device. If you had a magic wand, what would you wish for? The trick to accelerating design projects is not an unlimited budget, hiring ten more engineers, or paying a Nationally Recognized Testing Laboratory (NRTL) to only work for you.

I know a secret for accelerating design projects that will work, but first, you need to understand why projects take as long as they do. Yes, I worked on a few design teams, but I learned the most from watching companies make mistakes that created delays and cost them time. Sterility tests can not be made shorter, guinea pig maximization tests (GPMT) can’t be completed in four weeks, and your electrical safety testing report will not be delivered when the lab promised it would be.

Accelerating design projects by preventing testing delays

The primary source of delay is not that testing is delayed, but rather the testing is not started as early as it could be. Some managers believe that the solution is to use a Gantt chart. Unfortunately, Gantt charts are not a solution. Gantt charts are just tools for monitoring projects. There is much more to project management. If you forget to do just one test, your entire project will be delayed until that test is finished. Therefore, making sure you identify every required test is an essential early project task–even before you start designing your device. You also need to update the plan when things change.

Start with a generic template for your testing plan

Our firm has a template for a device testing plan that we use for every pre-submission request. Getting help in creating your testing plan is one of the most important reasons to hire our firm to help you with a pre-submission request. Surprisingly, our template is more comprehensive than most design plans. What makes our plan surprising is that it’s a generic testing plan that I created in 30 minutes. If you would like it, just email me at rob@13485cert.com. We also have an updated template for combined design and risk management plans.

I’m not suggesting that our plan template already includes every single safety and performance test. Our testing plan does not include everything. However, we spend several hours looking for applicable guidance documents and researching the testing requirements for your device. Then we add the requirements we find to your customized testing plan in the pre-submission request.

Basics of shortening the critical path

If your testing plan includes 100% of the safety and performance tests that you need, your project will still be unnecessarily delayed. The reason for the unnecessary delay is that you are not taking advantage of the three most important timing factors:

  1. First, do every test in parallel that you can.
  2. Second, identify any tests that must be done sequentially.
  3. Third, protect your critical path from further delays.

If the three “tricks” I listed above are new to you, you might consider reading more about a single-minute exchange of die (SMED) techniques, and applying the theory of constraints to project management:

In summary, I gave you several clues to the one secret. But the one secret is simple and practical. You need someone on your team who only focuses on the testing plan. Usually, every person on a design team is multitasking, but none of us can focus when we are multitasking. As the design project manager, it would be impossible for you to focus on one task. You are a project manager of a design team, and managing a project team is inherently all about multitasking. Therefore, you need to give one person on your team the task of focusing on the testing plan throughout the entire project. It doesn’t have to be the same person during every phase of the project. In fact, by rotating who that person is, each person assigned this responsibility only needs to be dedicated for a short duration. This is a critical concept. One person must be focused on your testing plan, and that person must be dedicated to that task as long as they are responsible for focusing on your testing plan. You might even consider making a big deal out of it…

Our testing plan is my life t shirt 1 298x300 Accelerating design projects   one secret you havent heard

Managers are always looking for creative ways to motivate teams. Custom t-shirts are fun, you can quickly design a different t-shirt for each role on the team, everyone can wear their t-shirt to team meetings, and the testing plan t-shirt will identify who has the responsibility for focusing on the secret to completing the project on schedule. You can order one of these t-shirts from us for $15. I dare you to compare the cost of a few custom t-shirts with the other solutions you were considering.

Our testing plan is my life t shirt 1 Accelerating design projects   one secret you havent heard
Our Testing Plan is my life T-Shirt
Please click the button to confirm that you'd like to receive the t-shirt shown in the picture. Please let us know what size you would like (M, L, XL, 2XL, 3XL). Only white t-shirts available with black graphics. We also need your shipping address. Shipping via US Postal Service is FREE. If you want the t-shirt expedited, we can ship it via FedEx to you. We will invoice you for the cost of our FedEx shipping to your location.
Price: $15.00

Your cart is empty

If you liked this article, please share it. If you are interested in design control or risk management training, consider purchasing one of our webinars on those topics for your company.

Accelerating design projects – one secret you haven’t heard Read More »

Statistical Techniques Procedure (SYS-022)

The video provided below shows you exactly what you will receive when you purchase our Statistical Techniques Procedure (SYS-022).

Your cart is empty

Statistical Techniques Procedure

This procedure defines requirements for utilizing statistical techniques to establish, control, and verify the acceptability of process capability and product characteristics.

This procedure is the primary document meeting the applicable regulatory requirements for statistical techniques as defined in the Quality System Manual (POL-001).

When is the live webinar scheduled for the Statistical Techniques Procedure?

The live webinar has been rescheduled for Monday, December 9, 2024 @ 10:30 a.m. ET. If you purchased the procedure before December 9th, you will receive login information to participate in the live webinar. The webinar will be hosted on Streamyard.com. If you are unable to participate in the live webinar, please send us your questions in advance so that we can be sure to address your questions in the live webinar. You will be able to download the recording from the Dropbox folder after the live webinar and you can watch it as many times as needed.

Contents Sold with the Statistical Techniques Procedure

Contents of SYS 022 Statistical Techniques Procedure (SYS 022)

If you return the exam to Rob Packard via email in the native Word format, we will grade your exam and provide a corrected version and a certificate for training effectiveness.

Statistical Techniques Procedure Statistical Techniques Procedure (SYS 022)
SYS-022 - Statistical Techniques Procedure
The purpose of this procedure is to define requirements for utilizing statistical techniques for establishing, controlling, and verifying the acceptability of process capability and product characteristics. If you would like to make other payment arrangements, please contact us @ rob@13485cert.com or +1.802.281.4381.
Price: $299.00

Please note: This product will be delivered to the email address provided in the shopping cart transaction. After the transaction is verified, please check your email for the download. To view all available procedures click here.

Rob Packard 300x260 Statistical Techniques Procedure (SYS 022)

Rob Packard is a regulatory consultant with ~25 years of experience in the medical device, pharmaceutical, and biotechnology industries. He is a graduate of UConn in Chemical Engineering. Rob was a senior manager at several medical device companies—including the President/CEO of a laparoscopic imaging company. His Quality Management System expertise covers all aspects of developing, training, implementing, and maintaining ISO 13485 and ISO 14971 certifications. From 2009 to 2012, he was a lead auditor and instructor for one of the largest Notified Bodies. Rob’s specialty is regulatory submissions for high-risk medical devices, such as implants and drug/device combination products for CE marking applications, Canadian medical device applications, and 510k submissions. The most favorite part of his job is training others. He can be reached via phone at +1.802.258.1881 or by email. You can also follow him on YouTubeLinkedIn, or Instagram.

Statistical Techniques Procedure (SYS-022) Read More »

Scroll to Top