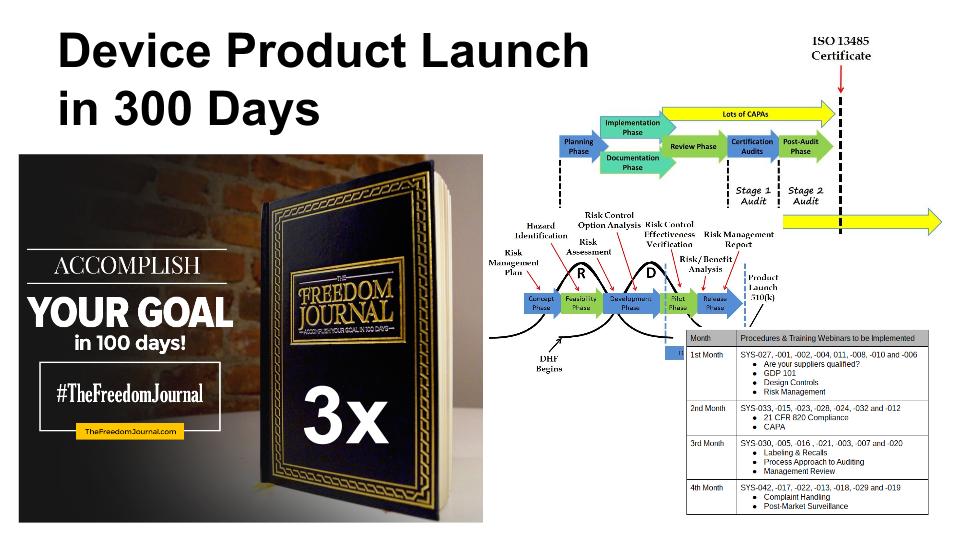
This article lists my top 10 ideas for time management to help prevent work overload–including suggestions for apps and other resources.
I am a workaholic and I don’t recommend it–unless overweight, out of shape, friendless and divorce sounds like a great life plan. I work with regulatory affairs and quality assurance managers at every client, and 100% of them have insufficient resources. Expectations internally and externally never decrease. The saying used to be, “Do more with less.” Now it feels like we have one egg, one basket and we are expected to save the world.
Stop feeling sorry for yourself. Every department manager feels this pressure. If you don’t believe me, look around you. Everyone is popping 400mg of ibuprofen and stressed to their limit.
So what can you do to make things better?
That question is critical. It shows that internally you acknowledge that you can do something to make things better. I obviously don’t have all the answers, but I have found some tools in the past year that really made a magnificent difference in helping me with time management. 100% of these ideas were suggested by others that appear to be more at peace and happier than I was last year.
#1 Get some sleep
Two years ago I woke up after 3-4 hours of sleep every night. Last year I was almost up to 6 hours of sleep on a good night. Now I am consistently getting 6-8 hours of sleep, and once I slept for 9 hours. There are lots of suggestions for how to get more sleep, and I’ve tried them all. What works for me is: 1) no alcohol or coffee within 4 hours of bedtime, 2) melatonin just before bed, 3) exercise every day, 4) eating well, and 5) a habit of reading each night to calm myself and relax. I also use a white noise app on my phone.
#2 Budget your time management
You will never get everything done. It’s a fact. Just like money, you can always spend more. Instead, decide how much of your life you want to spend doing things. Don’t micromanage your time. Think of the big picture. There are 168 hours in a week, and >42 hours should be spent sleeping. 40-50 hours a week will be spent working. 5-10 hours per week will be spent getting to work. More than two-thirds of your life is spent sleeping and work-related–if you’re not a workaholic. Be very selfish of how you budget the remaining third of your life. I like to re-read habit #3 from Steven Covey’s book “7-Habits of Highly Effective People.” It will help you remember what’s important. Your priorities should be physical health, mental health and your family. If you devote an hour a day to each of those, you might have time left for eating, grooming and reading a book. Yes, you need vacations too!
#3 Minimize multitasking
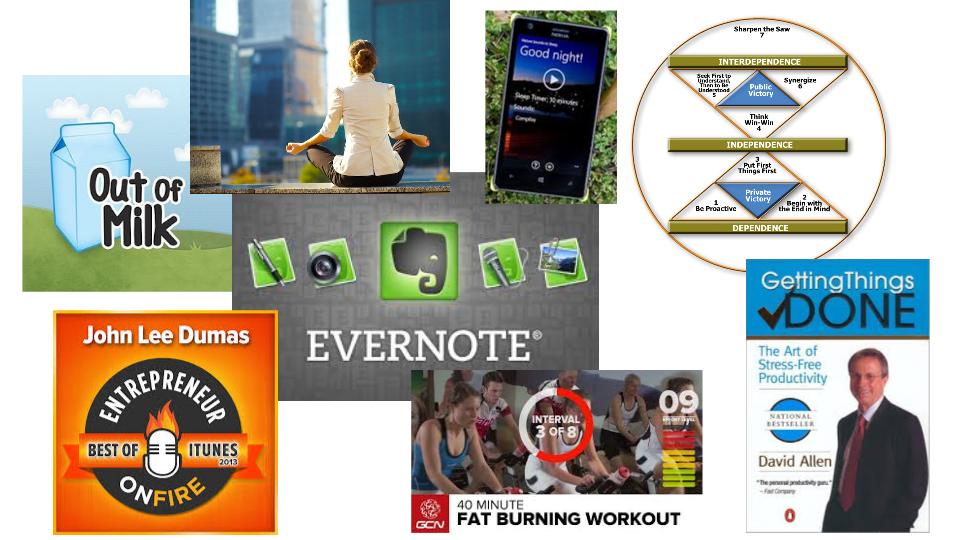
Some people believe time management is managing multiple tasks at once, but it is actually less efficient to multitask. Picking something up, putting it down, picking it up again…didn’t you learn from your lean manufacturing training that motion, waiting and queue are all muda (i.e., waste). You need to start a task, finish that task and then start the next task. If you want more advice on this topic, try reading “Getting things done” by David Allen. This one was recommended to me by an uber-productive orthopaedic surgeon.
#4 Don’t forget to “sharpen the saw”
This is the seventh habit from Covey’s book. You should never stop improving. For example, entrepreneurs need to learn marketing. I don’t have time for an executive MBA to learn marketing. Instead, I teach myself every day while I’m working out. I have a bicycle on a trainer set-up in front of my TV. The TV is only connected to the internet. If I need a break, I watch Netflix while cycling. However, usually I’m listening to podcasts, watching YouTube videos about marketing and software tools or I’m reading books on my Kindle. I also purchase a lot of audiobooks that I listen to in the car while driving my children to rock climbing, soccer, plays and during my two-hour ride to and from the nearest airport. This is the only kind of multitasking I’m good at.
#5 Just say no.
You need to put first things first (i.e., habit #3). On a scale of 0-10, how important is it. Is it important to you, your boss, your spouse, your children or your best friend. If not, why are you wasting your precious time on it. Say no. If it’s a 9 or 10 to your spouse, say yes–even if it’s a 2 on your scale. If you have a time conflict with two items that are high on the scale, then you need to find a win-win (i.e., habit #4). This is why communication skills and empathic listening (i.e., habit #5) are the most important skills you will ever learn.
#6 Don’t read your emails “real-time”
You should have a plan for what you are going to do each day. Reading your emails throughout the day will result in reactive behavior that will always result in time management failure. Be proactive (i.e., habit #1). Read your emails just before lunch in a batch and just before you go home in a batch. You should also read “Getting things done” by David Allen. He has fantastic advice for how to process emails. This is an area I’m still working on, but I get 400+ emails a day and that doesn’t include spam, social media or promotions. You should also tell people you work with, “Call me or text me if it’s important.” Good advice for any client of mine. For example, you should probably text me if the FDA is coming on Monday and you need my help.
#7 Use productivity apps for time management
Microsoft seems to have a strangle hold on corporate America, but Outlook is a horrible tool for managing your tasks and time. You need something for personal time and personal tasks, because you have less time available for the things that are more important in your life (i.e., health, family and friends). If I empty the milk carton, I grab my phone and add milk to my “Out of Milk” app. I also use this app for planning what I need for trips, meetings and Christmas present ideas for the kids. Evernote is an uber-app. It organizes everything. Website links, blog ideas, business cards, photos, an address, directions, photos of the person I’m meeting and I use it for lists too (if I already have it open instead of Out of Milk). If you want to know how the most productive people in the world use apps like Evernote, John Lee Dumas includes apps like Evernote in every entrepreneur interview he does–1,303 podcasts and counting.
#8 Block off time to get work done
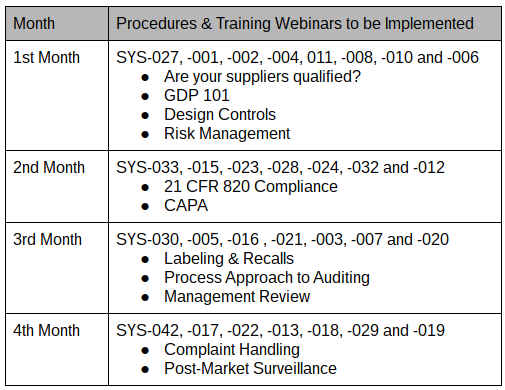
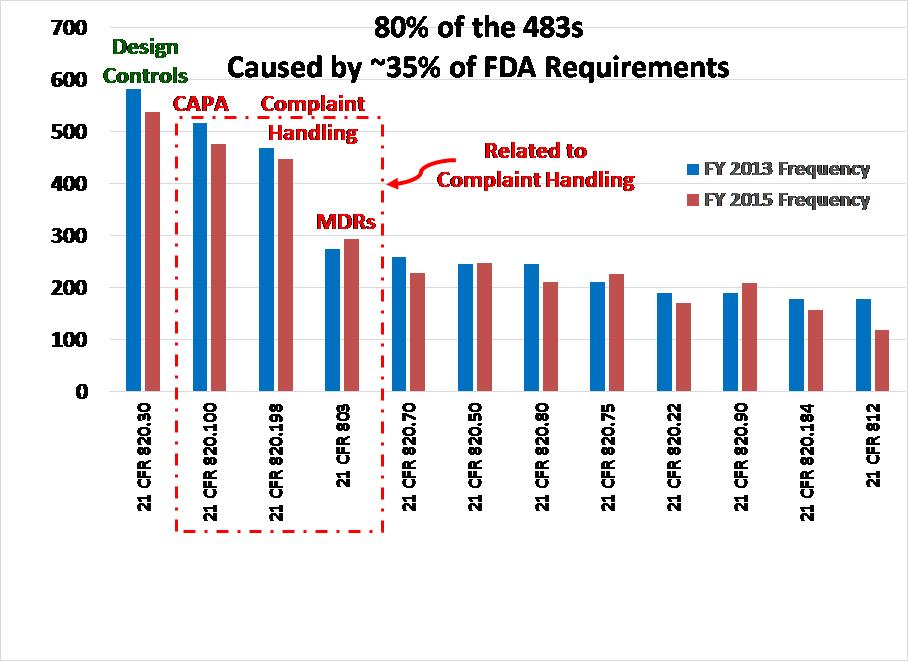
Some people believe that time management only involves scheduling meetings. You schedule weekly meetings with your boss. You schedule lunch meetings. You should also block off some time for getting work done–without interruptions. You might try blocking off every day from 11:30-Noon for emails, Noon-1pm for a lunch and a walk and 4:30-5pm for emails. If you need to review complaints each day for the need to report as an adverse event, block off some time for that each day. My advice would be to devote time to reviewing CAPAs, complaints and MDRs every day. These are the most critical areas for FDA inspections and you can’t afford to let these tasks fall behind. If you have these tasks assigned to you, then you work on the most urgent task and get it done. Then you schedule the next step for that CAPA, complaint or MDR and go onto the next task you scheduled. If you manage these processes, then you should block off time for reviewing metrics and investigate the exceptions. If it seems like you never have enough time in your schedule for all the tasks, maybe you need to delegate some of those tasks to other departments or people in your department.
#9 Schedule shorter meetings
Not all meetings deserve 1 hour. Some things can be done in 15 minutes, 30 minutes or 45 minutes. Learn about good meeting etiquette, make an agenda and manage the meeting so it’s done on-time or early. Make sure you show up on-time and get it done on-time or early. If people leading meetings are poor at time management, do not let them lead the meeting.
#10 Schedule breaks too
Outlook will allow you to schedule back-to-back meetings from 7am to 7pm (or longer). That doesn’t mean that you should, and that is definitely not good time management. Time management needs to create windows of time where you can rest too. I drive a lot. In order to survive 50,000 miles of driving a year with a congenital spine defect (i.e., L5 fused to pelvis one one side), I need to take breaks and stretch. When I don’t do this I pay dearly. The same thing happens to me when I try to work 12 hours straight without a break. You will be more focused and productive if you take a break once and while.
 Three types of 510k submissions